
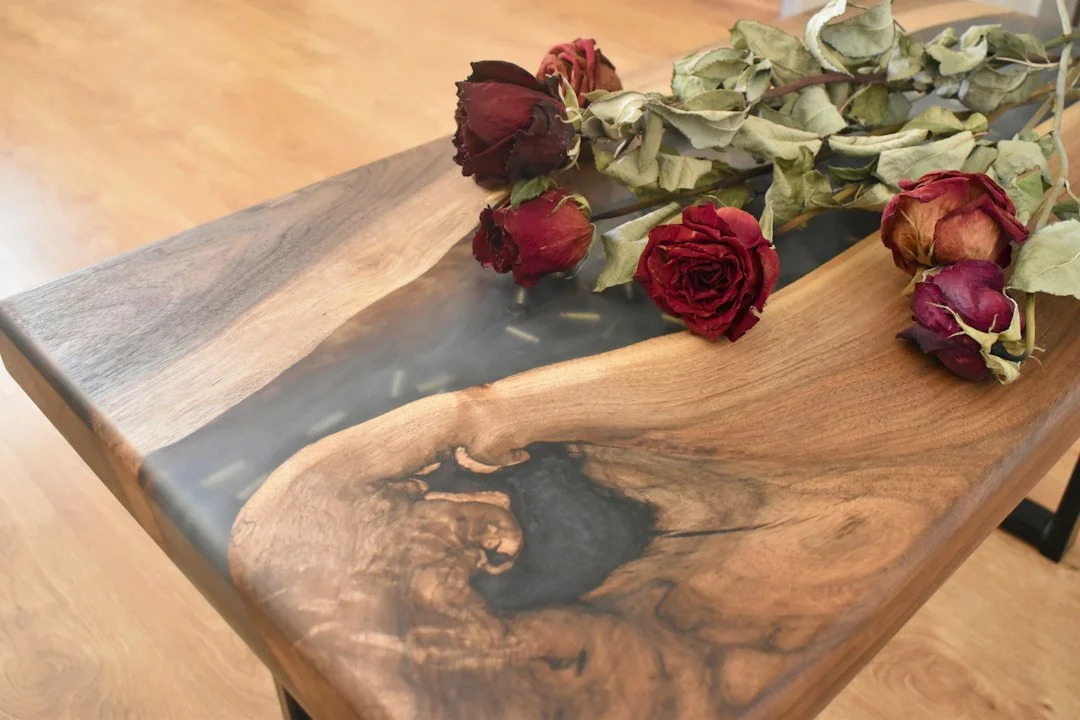
Premium resin art kits contain carefully selected materials that determine the clarity, durability, and workability of the final piece. Understanding what materials are used in premium resin art kits helps buyers evaluate quality standards, compare supplier offerings, and select kits that meet specific project requirements. From the resin base to pigments, molds, and safety equipment, each component plays a distinct role in the crafting process.
Core Resin Components
Two-Part Epoxy Resin System
The foundation of any premium resin art kit is a two-part epoxy system consisting of resin and hardener. When mixed at the correct ratio—typically 1:1 or 2:1 by volume—these components undergo an exothermic chemical reaction that transforms the liquid into a clear, durable solid. Premium kits use low-viscosity, UV-stabilized epoxy formulations that minimize yellowing over time and cure to a glass-like finish within 24-72 hours at room temperature.
Material Specifications
- Resin viscosity: 200-400 cP at 25°C for easy pouring and bubble release
- Hardener chemistry: Cycloaliphatic amine or polyamine hardener for scratch resistance
- Mix ratio tolerance: ±5% by volume to allow minor measurement variance
- Pot life: 30-45 minutes working time before viscosity increases significantly
- Curing temperature range: 20-25°C optimal; lower temperatures extend cure time by up to 50%
- Shore D hardness: 80-85 after full cure (7 days) for durability
Compared to polyester or polyurethane resins, epoxy systems offer superior clarity, lower shrinkage (<2% volumetric change), and better adhesion to embedded materials such as dried flowers, wood, and metal leaf.
Colorants and Pigments
Liquid Resin Dyes
Premium kits include alcohol-based or epoxy-compatible liquid dyes that disperse evenly without introducing air bubbles. Concentration ratios range from 0.5-3% by weight; exceeding this can inhibit curing. Liquid dyes produce translucent, stained-glass effects ideal for layering and gradient pours.
Mica Powder Pigments
Mica powders deliver metallic, pearlescent, and opaque finishes. Particle sizes between 10-60 microns ensure smooth mixing without settling. We recommend adding 2-5% mica by weight and stirring thoroughly to eliminate clumps. Mica creates shimmer effects that shift under light, popular for ocean-themed and geode-style resin art.
Comparison of Colorant Types
| Colorant Type | Transparency | Concentration | Best Use Case |
| Liquid dye | Translucent | 0.5-3% | Layered pours, gradient effects |
| Mica powder | Opaque/metallic | 2-5% | Geodes, ocean waves, shimmer |
| Acrylic paint | Opaque | 5-10% | Solid colors, not recommended for clarity |
| Alcohol ink | Semi-transparent | 1-2% | Abstract patterns, petri dish designs |
Acrylic paint is included in some beginner kits but is not ideal for premium work—it can cloud the resin and weaken the bond. Alcohol inks create unpredictable, organic patterns but require precise timing during the gel phase.
Silicone Molds and Release Agents
Food-Grade Silicone Molds
Premium kits feature food-grade silicone molds (BPA-free, heat-resistant from -40°F to 440°F) in designs ranging from jewelry bezels to coaster trays and decorative shapes. Silicone's natural flexibility allows easy demolding without release agents in most cases. Mold cavity depth typically ranges from 5-25mm, accommodating thin pendants to chunky paperweights. We stock molds with detail resolution down to 0.5mm for intricate botanical and lace patterns.
For reference, our DIY Soap Making Kit includes similar food-grade silicone molds with grape and rose designs—these are also compatible with resin casting when coated with release spray.
Mold Release Best Practices
- Silicone spray release: Apply a thin mist 30 minutes before pouring; excess can leave surface blemishes
- Petroleum jelly: Use sparingly on mold edges for large pours; avoid contact with resin surface
- No release needed: High-quality silicone molds (Shore A hardness 20-30) release cured resin with gentle flexing alone
- Reusability: Premium molds withstand 200+ casting cycles before detail degradation
Mixing and Application Tools
Graduated Mixing Cups
Premium kits include 100ml and 250ml graduated silicone or polypropylene cups with clear milliliter markings for accurate ratio measurement. Silicone cups allow cured resin to be peeled out and reused; disposable plastic cups are single-use but eliminate cleanup. Mixing ratios must be precise—10ml variance in a 100ml batch can leave resin tacky or brittle.
Wooden Stir Sticks and Spreaders
Flat wooden sticks (15-20cm length) ensure thorough mixing without introducing excessive air. Stir slowly for 3-5 minutes, scraping cup sides and bottom to incorporate all hardener. Compared to metal or plastic, wood does not react with resin chemistry and is inexpensive enough for single-use disposal.
Heat Gun and Torch for Bubble Removal
A handheld butane torch or heat gun set to 100-150°C releases trapped air bubbles within 15-30 seconds of pouring. Pass the flame 10-15cm above the surface in quick sweeps—prolonged heat can scorch pigments or initiate premature curing. This step reduces surface bubbles by approximately 90% compared to untreated pours.
Essential Tool Checklist
- Digital scale (0.1g precision) for weight-based mixing
- Disposable gloves (nitrile, powder-free)
- Wooden stir sticks (pack of 50)
- Graduated silicone mixing cups (100ml, 250ml)
- Heat gun or butane torch
- Plastic droppers or pipettes for colorant dosing
- Craft mat or silicone work surface
Decorative Additives and Embedments
Dried Flowers and Botanicals
Preserved flowers, leaves, and petals add organic texture to resin pieces. Premium kits include pre-dried botanicals treated with silica gel to remove moisture—residual water content below 5% prevents cloudiness and air pockets. We source flowers at peak bloom and dry them for 7-10 days to lock in color. Our Preserved Dry Flowers Glass Dome Ornament DIY Craft Kit demonstrates this approach with curated flower mixes encased in resin and glass.
Metallic Leaf and Foils
Gold, silver, and copper leaf sheets (23-karat imitation or genuine) create luxe accents. Leaf thickness averages 0.1-0.2 microns; handle with tweezers to prevent tearing. Apply leaf to a thin base layer of resin, then seal with a second pour to prevent floating or wrinkling. Compared to mica powders, metallic leaf offers reflective surfaces rather than suspended shimmer.
Glitter, Sequins, and Beads
Polyester glitter (solvent-resistant) and glass beads maintain color and structure in resin. Plastic sequins may warp under the exothermic heat of large pours (up to 50°C peak temperature). Layer glitter at 1-3% by volume to avoid opacity; denser concentrations obscure embedded designs.
Additive Compatibility Table
| Additive | Moisture Sensitivity | Heat Tolerance | Recommended Layer |
| Dried flowers | High (must be <5% moisture) | Moderate | Mid-layer embed |
| Metallic leaf | Low | High | Base or mid-layer |
| Polyester glitter | Low | High | Any layer |
| Glass beads | None | High | Any layer |
| Plastic sequins | Low | Low (may warp >45°C) | Top layer only |
| Paper ephemera | High (seal with Mod Podge first) | Moderate | Mid-layer embed |
Safety Equipment and Workspace Materials
Personal Protective Equipment
Premium resin art kits include or recommend nitrile gloves (powder-free, 0.1-0.15mm thickness) to prevent skin contact with uncured resin, which can cause sensitization with repeated exposure. Safety glasses protect against splashes during mixing. For high-volume production or enclosed workspaces, we advise using a respirator with organic vapor cartridges rated for VOCs—though modern epoxy formulations emit fewer fumes than older polyester resins.
Work Surface Protection
- Silicone craft mats: Heat-resistant, wipe-clean surface; cured resin peels off easily
- Disposable plastic sheeting: Inexpensive protection for large pours; discard after use
- Wax paper or parchment: Resin does not adhere; useful for small projects
- Elevated work grids: Allow drips and overflow to fall away from the piece
Workspace ventilation is essential—open windows or use a fan to maintain air exchange of 4-6 room volumes per hour during mixing and initial cure. Although low-odor resins emit minimal VOCs, proper airflow reduces long-term exposure and accelerates solvent evaporation from alcohol inks and dyes.
Quality Indicators in Premium Kits
Resin Clarity and UV Stability
Premium resin formulations include UV inhibitors (HALS or benzotriazole compounds) that slow yellowing when exposed to sunlight. Standard epoxy yellows noticeably after 6-12 months of direct UV exposure; UV-stabilized resin maintains clarity for 2-3 years or longer. We test batches under accelerated UV aging (340nm UVA lamps, 8 hours = ~1 month outdoor exposure) to verify stability.
Certified Material Safety Data
Reputable suppliers provide Safety Data Sheets (SDS) detailing chemical composition, hazard classifications, and first-aid measures. Premium kits use resins that meet ASTM D4236 (art materials safety) and contain no bisphenol-A (BPA) or phthalates. For export markets, compliance with REACH (EU) and Prop 65 (California) is standard.
Consistent Mix Ratios Across Batches
High-quality manufacturers maintain ±2% viscosity variance batch-to-batch, ensuring predictable working time and cure characteristics. Inconsistent ratios lead to soft, tacky surfaces or brittle, cracked cures—common issues with off-brand or expired resin. We date-code every bottle and guarantee 12-month shelf life from manufacture when stored at 15-25°C.
Frequently Asked Questions
What is the difference between epoxy resin and polyester resin in art kits?
Epoxy resin cures through a chemical reaction between resin and hardener, producing minimal shrinkage (<2%) and superior clarity. Polyester resin cures with a catalyst (MEKP) and emits stronger fumes, shrinks more (5-8%), and yellows faster. Premium art kits use epoxy for its glass-like finish, better adhesion to embedments, and lower odor.
How much pigment should I add to resin without affecting the cure?
Liquid dyes: 0.5-3% by weight. Mica powders: 2-5% by weight. Exceeding these ratios can inhibit the hardener reaction, leaving resin tacky or soft. Always add colorants to the resin component before mixing with hardener, and stir thoroughly to eliminate streaks. For intense opacity, layer multiple thin pours rather than adding excessive pigment to a single batch.
Can I reuse silicone molds from soap kits for resin casting?
Yes, provided the mold is food-grade silicone rated for temperatures up to 440°F. Resin exotherms during cure can reach 40-50°C in large pours, which is well within silicone tolerance. Apply a light coat of silicone mold release spray 30 minutes before pouring to ensure easy demolding. Our DIY Soap Making Kit molds are fully compatible with resin when prepped this way.
What minimum order quantity do you require for wholesale resin art kits?
Standard resin art kits start at 50 units per SKU. For custom formulations, private-label packaging, or branded mold designs, MOQ increases to 200 units. Mixed assortments with multiple colorant sets or mold shapes are available at 100+ units with volume-tiered pricing. Lead time for custom kit development is typically 3-4 weeks from specification approval.
How do I prevent bubbles in resin art projects?
Mix resin slowly for 3-5 minutes to minimize air entrainment. After pouring, pass a handheld torch or heat gun 10-15cm above the surface for 15-30 seconds to release trapped bubbles. Pour in thin layers (5-10mm) rather than one thick pour—this allows bubbles to escape before the resin gels. Working in a warm room (22-25°C) reduces viscosity and improves bubble release.
Related Resources
Related Products (2)
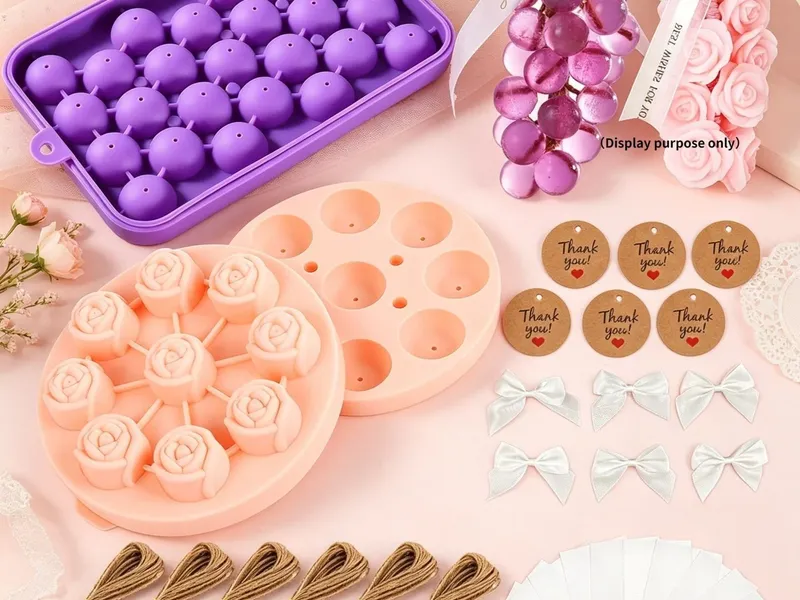
DIY Soap Making Kit — 2 Silicone Molds (Grape & Rose) with Gift Bag & Tags
Complete melt-and-pour soap making kit featuring 2 food-grade silicone molds in grape cluster and rose bloom designs, 500g clear soap base, colorants, fragrance, and ready-to-gift packaging with kraft bag and hang tags. Zero extra tooling required — buyers unbox, melt, pour, and gift.
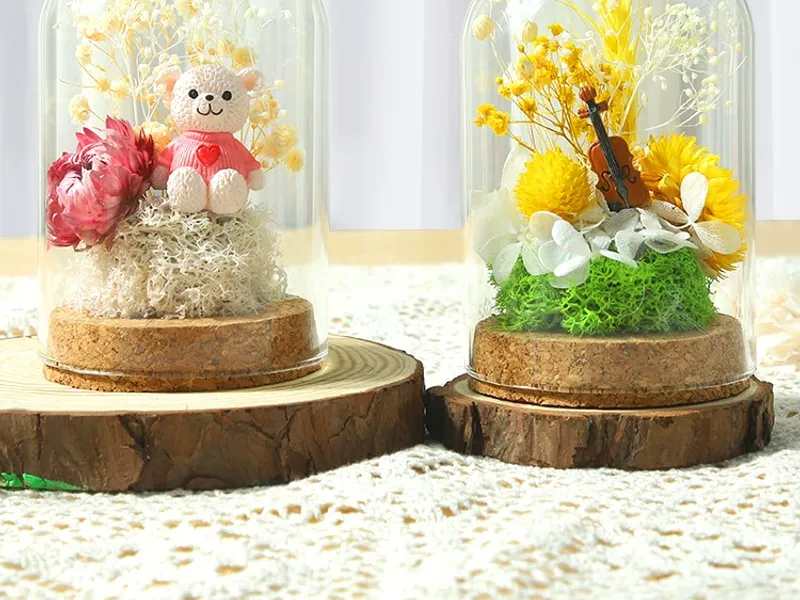
Preserved Dry Flowers Glass Dome Ornament DIY Craft Kit for Wholesale
Complete preserved flower glass dome kit pairing real dried botanicals with a 12cm borosilicate cloche and solid wood base. Assembles in 25 minutes with no glue gun, no drying time, and no floral skill required.
Related Collections
Related Craft Families
Related Solutions
Complete guide to epoxy resin components, pigments, and tools
Request Bulk Resin Kit Quote